This guide demonstrates the steps to managing your Third-Party Order Integration via the Grafterr Admin Panel.
The Third-Party Order Integration functionality allows orders from JustEat, Deliveroo and Uber Eats to be received and processed via your Grafterr Operator App.
While this guide advises the steps to manage your existing integration after setup, if you don’t currently take advantage of this on your system then simply get in touch with our Customer Success Team at customersuccess@grafterr.com for more information and to get set up!
*IMPORTANT NOTE* - Once your third-party integration is live, it is mandatory for any third-party menu/item adjustments to be made within the Grafterr Admin Panel only. If items are updated on the JustEat/Uber Eats/Deliveroo platform directly, these items will not be recognised as part of the integration and lead to missing items in customer orders.
To prevent any issues with the integration, only use the Grafterr Admin Panel to update your menu items.
Updating your Operator App
Before going live with the integration, make sure that your Operator App is updated to the latest version available.
To update your Operator App, press Extras followed by Settings and then scroll down to the bottom of the screen to the Software Version section - press the green button to check on the Google Play Store whether an update is available.
When your Operator App is up to date, the Settings screen will have an ON/OFF switch in the Third Party Orders section - ensure this is switched ON.
Managing Third-Party Channels
To view the channels currently integrated, log in to your Admin Panel. Once logged in, select Third Party on the left-hand side of the screen, followed by Third Party Sales Channel.
The Third Party Sales Channel screen will open, listing all connected channels.
In the example below, JustEat, Deliveroo and Uber Eats are active.
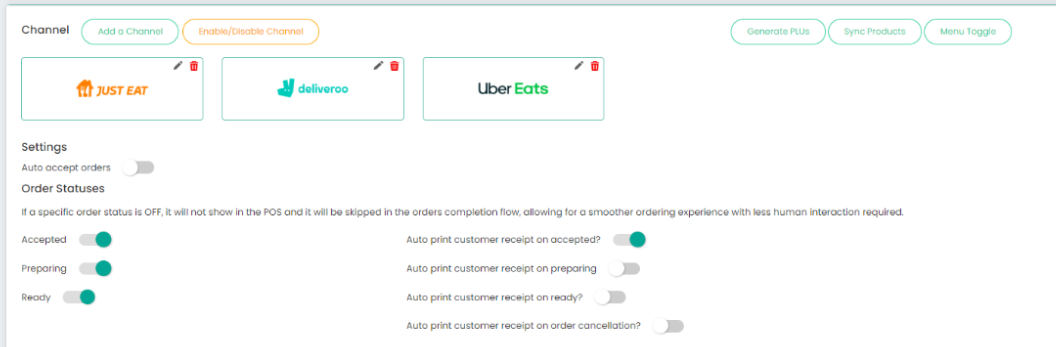
If you wish to automatically accept third-party orders, turn the Auto Accept Orders switch ON, here you can select the device orders will be accepted on automatically (if more than one Operator App device is used on the premises).
The Order Statuses section allows you to change the number of steps used throughout the order completion process - reducing the number of steps will reduce the amount of human interaction required. Accepted, Preparing and Ready are the options that can be turned ON or OFF - you can also choose whether customer receipts will automatically print on status changes by selecting the relevant toggle switches.
Menu Item Updates
To add or edit new menu items for your third-party menus,log in to your Admin Panel. Once logged in, select Interactive Menu Management on the left-hand side of the screen, followed by Items.
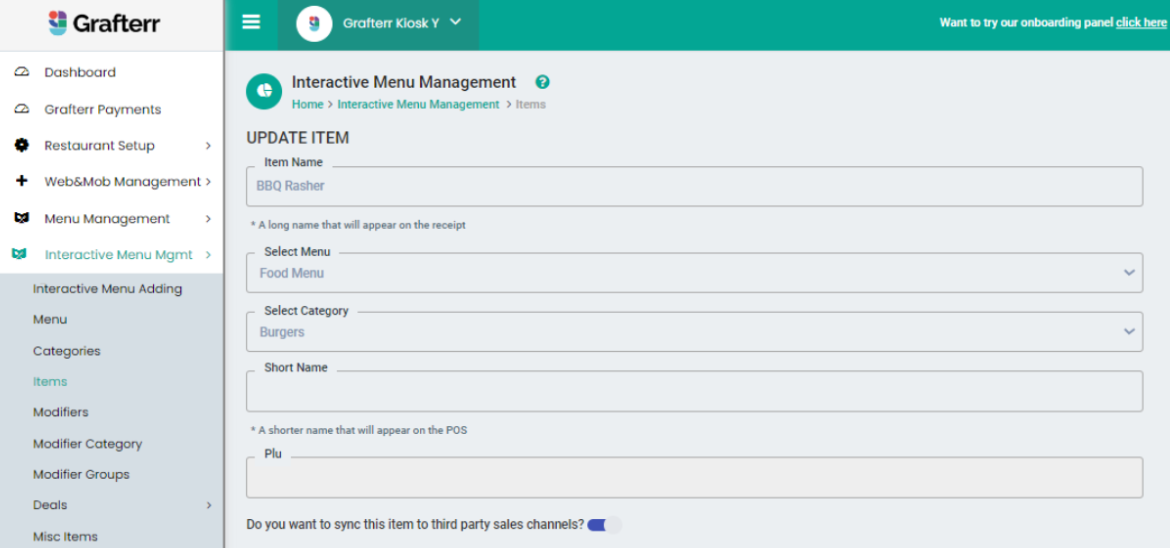
If different prices are applicable for different channels - for example, if different prices are charged on JustEat, Uber Eats and Deliveroo separately, each channel will need to have a separate item.
When creating or editing a menu item, the Do you want to sync this item to third party sales channels? switch must be turned ON to enable the item to be available on the relevant third-party channel(s).
To specify which channel(s) that the item will be available for, select the Urban Piper section to open the Urban Piper Options box. Here, select the relevant checkboxes to ensure that when products are synced, the item will be available on the chosen channel(s).
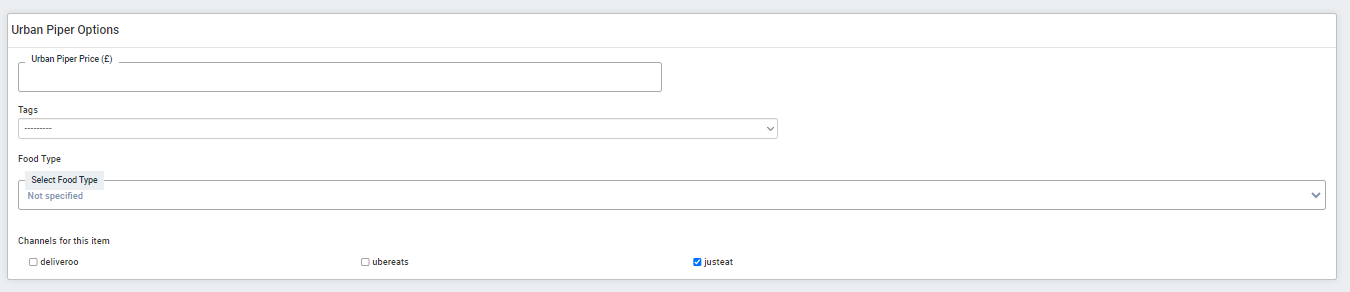
For the above example, only JustEat is selected as this item would have different pricing on Uber Eats and Deliveroo.
No other details need to be entered in this box, only the specified channels.
Once any adjustments are made, click Update Item to add your item or save any completed changes.
Modifiers
As part of the third-party integration, modifiers must be grouped together.
To create these groups, select Modifier Groups within Interactive Menu Management on your Admin Panel.
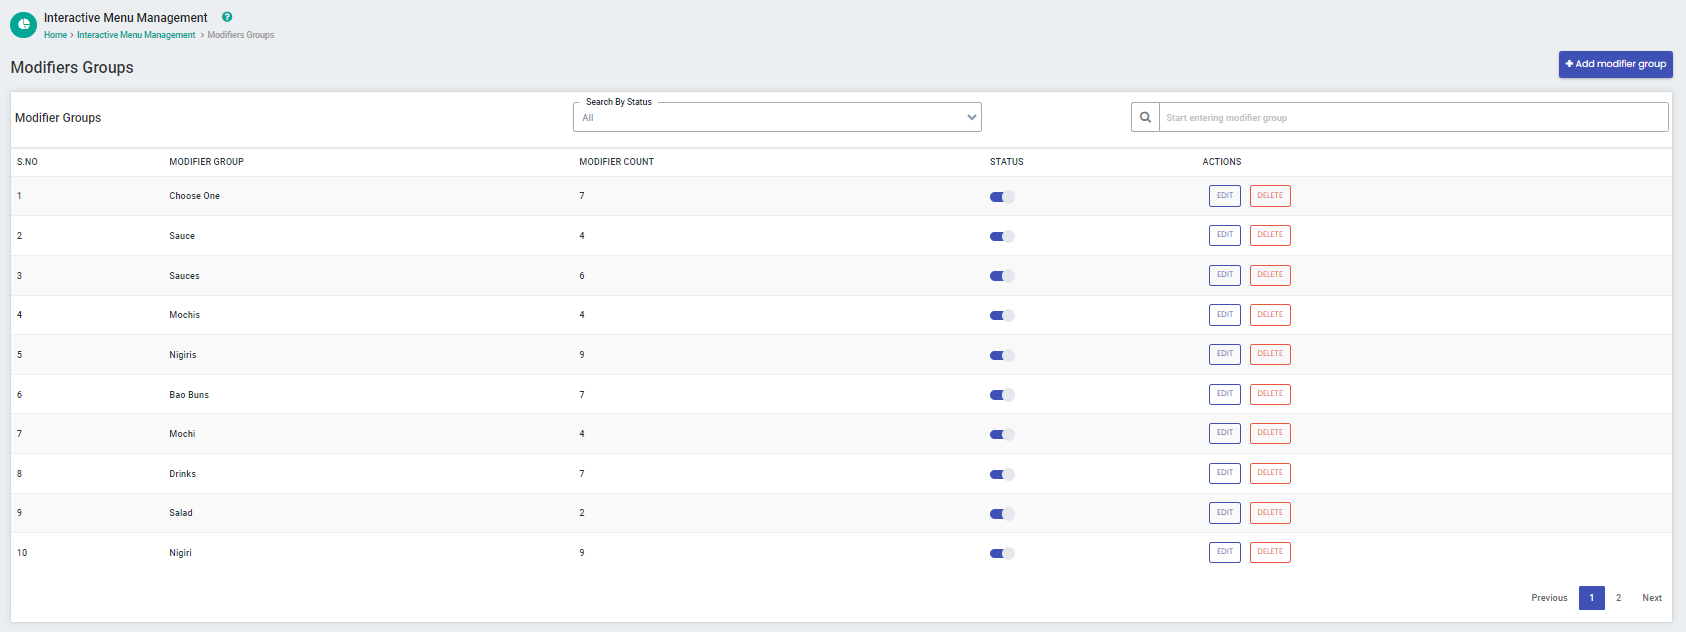
The Modifier Groups screen will open, displaying all existing groups, the number of Modifiers within each group and options to deactivate, edit or delete the groups.
To create a new group, click the + Add Modifier Group button to open the pop-up.
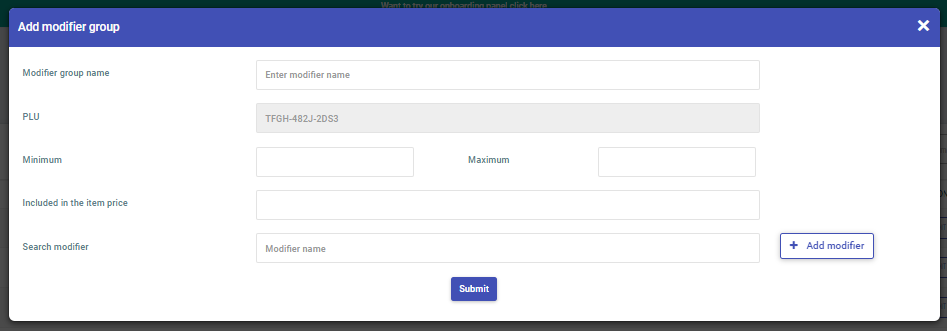
Enter the Modifier Group Name, the Minimum and Maximum number of options that can be selected by the customer, how many modifiers are included within the overall item price, and use the Search Modifier textbox to add any modifiers to the group.
Once all necessary modifiers are added to the group, click Submit to create your Modifier Group.
To add your Modifier Group to a menu item, select Items within Interactive Menu Management.
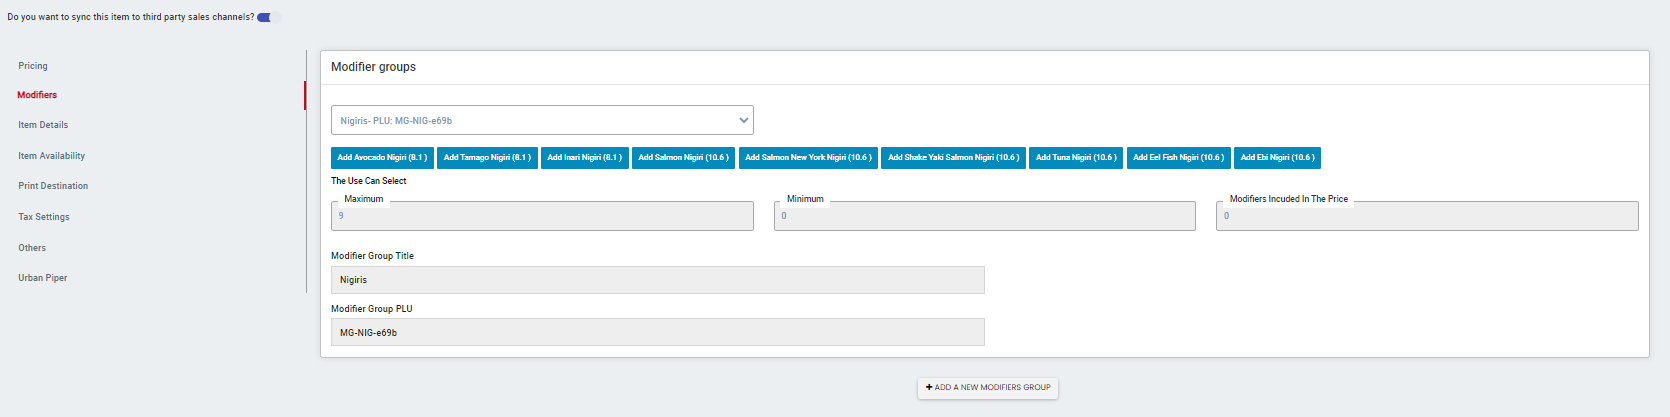
Select the Modifiers section to select your Modifier Group, where all applicable modifiers will be pre-populated. Click Submit to complete the addition of your Modifier Group to your menu item.
Assigning your Third Party Items to Printers/Displays
On your Operator App, press Extras followed by Kitchen Settings. On the Kitchen Settings screen, press Kitchen Setup for Items to assign your menus, categories or items to the relevant Kitchen Printer or Kitchen Display. Once all items have an assigned printer/display, press the Update Kitchens button for these changes to take effect.
Updating your Third-Party Menus
Once all necessary menu/item updates have been completed, select Third Party, followed by Third Party Sales Channel on your Admin Panel.

After making any menu changes, it is important to click the Generate PLUs button first - this will make sure that all relevant menu items have an applicable product code, which is required for the integration to successfully send orders to your Operator App.
Once the Generate PLUs button is clicked and the process complete, click the Sync Products button to push your third-party menus. Once this is clicked, our Customer Success and 24/7 Customer Support teams will receive immediate confirmation that your product sync has been completed successfully - either the Customer Success or 24/7 Customer Support teams will then publish the menus on the third-party channels upon receiving the automated confirmation. Please be aware that due to the integration there may be a few minutes between product sync, publishing and updating live on the relevant channels due to the integration.
It is vital that while the integration is active that all menu changes are completed on your Grafterr Admin Panel only - if menu items are changed on the third-party channels directly, these will not be recognised as part of the integration and can cause both issues with the integration itself and also would not display these items on your Operator App.
X
![]()